The four panels
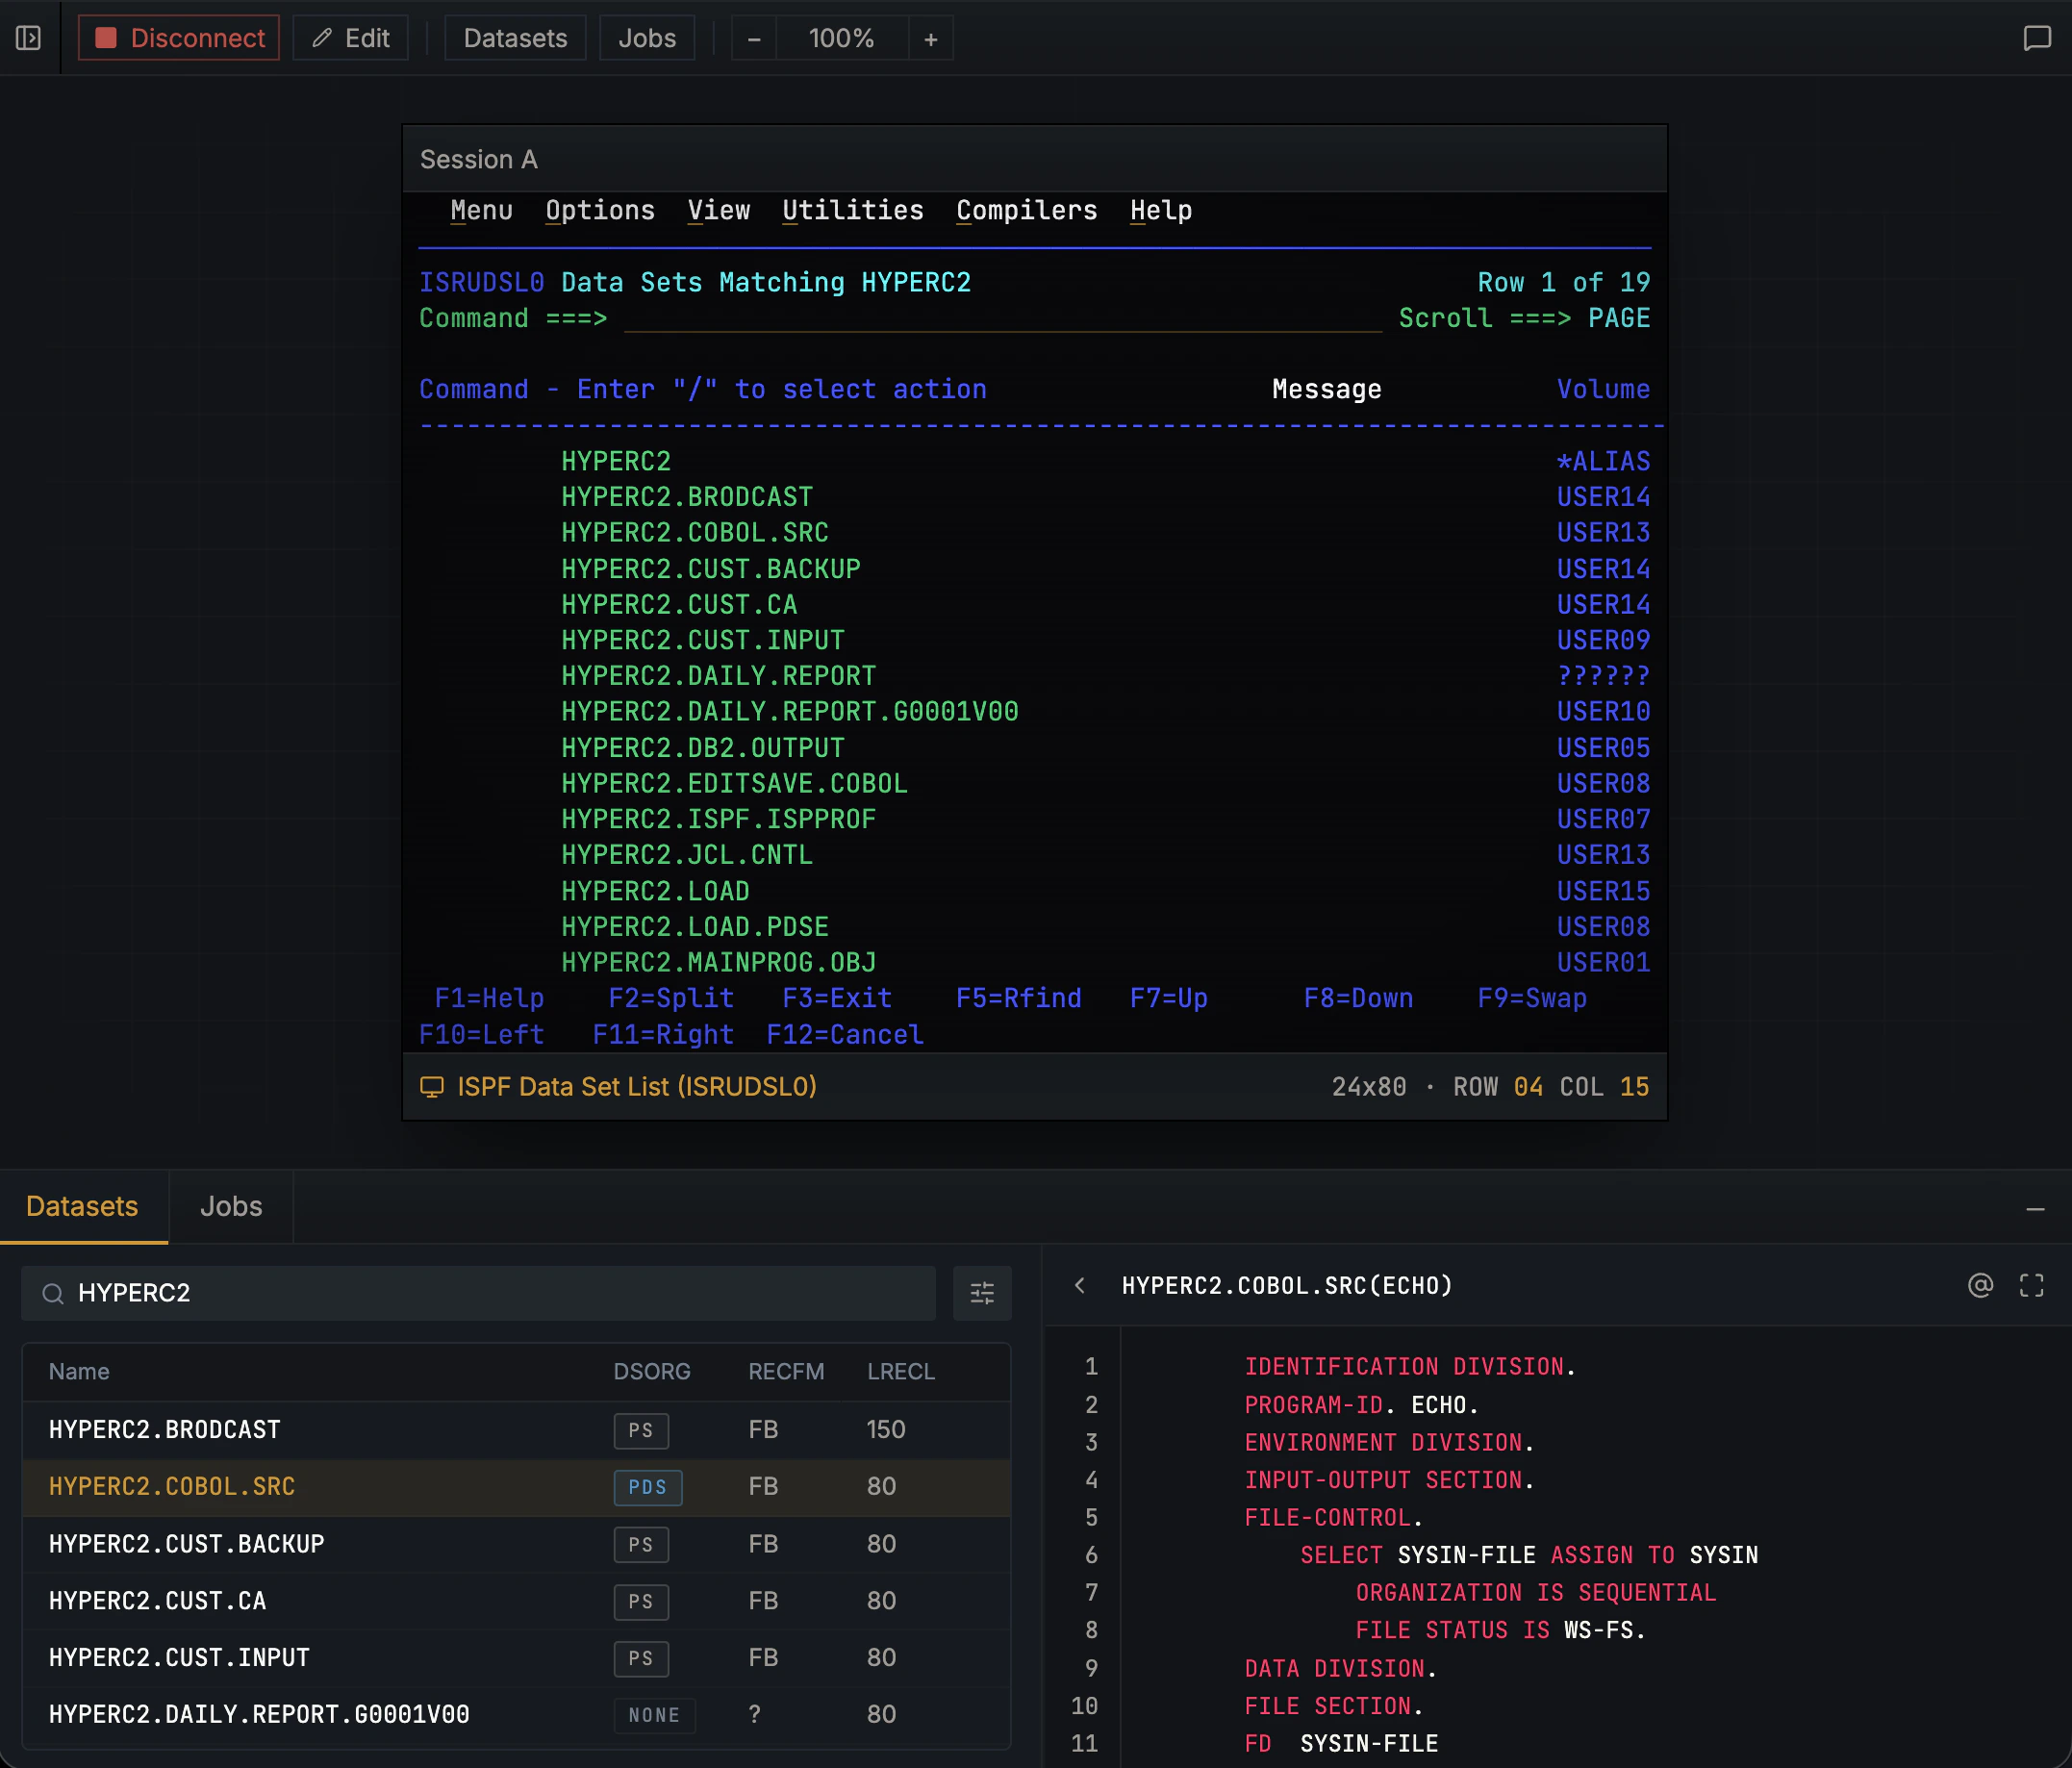
- Terminal panel. A rendering of the mainframe’s TN3270 green-screen interface. Click any cell to position the cursor, type into input fields, and send PF keys from your keyboard. The screen you see is the actual screen the mainframe sent.
- Datasets panel. A clickable browser for the mainframe filesystem. Filter by HLQ, expand a PDS to see its members, preview a member inline.
- Jobs panel. A live view of the JES queue. Tracked jobs update in real time, with return codes and spool counts on each row.
- AI agent panel. A chat where the agent does the work for you. It reads source, submits jobs, decodes VSAM records, runs COBOL, and uses the same operations the other panels expose.

Using the datasets panel
The Datasets tab is your browser into the mainframe filesystem. The search bar at the top is pre-seeded with your HLQ as<user>.**, so your own datasets show first; edit the pattern to widen or narrow the list.
-
Filter by HLQ. Type a pattern like
BANK.PROD.**to scope the list. Use the filter menu for finer cuts (DSORG, RECFM, etc.). - Click a PDS to expand its member list. Click a member to preview it inline.
-
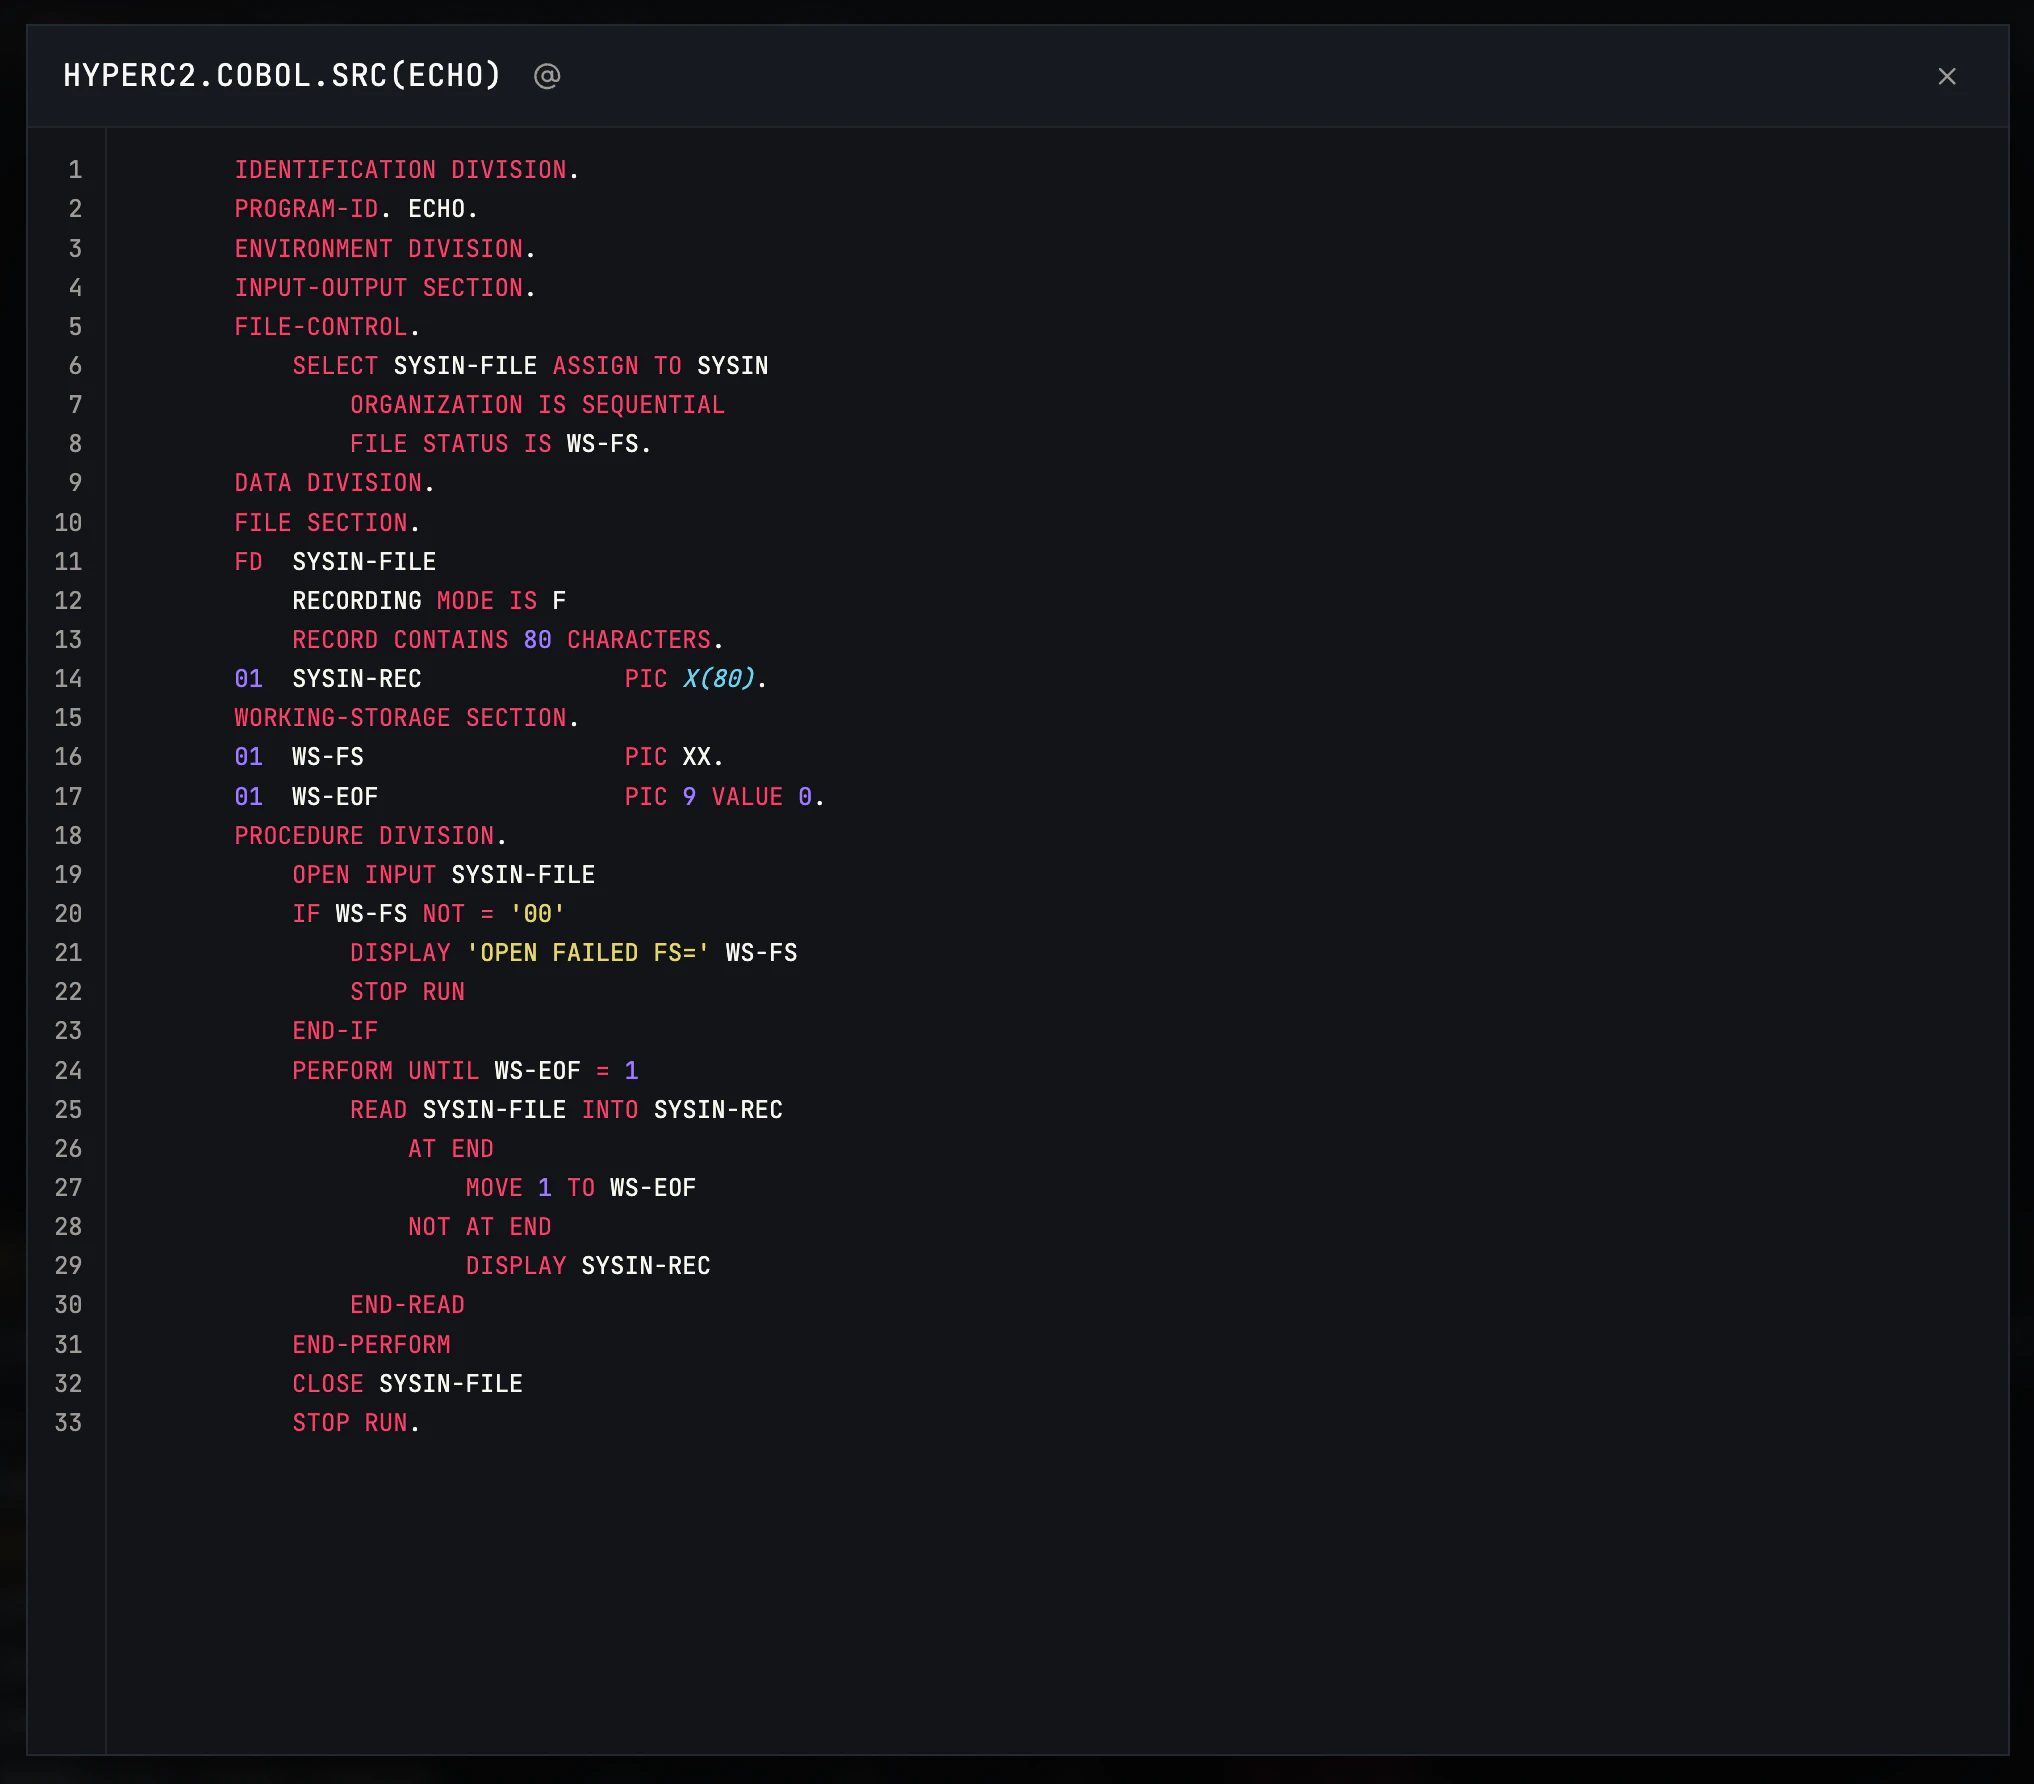
Click a PS or VSAM dataset to preview it directly.
-
Open full view. The maximize button next to @ expands the preview to fullscreen for easier reading.
-
Send to chat. In the preview header, click the @ button to attach the dataset or member as
@ACME01.SOURCE.COBOL(CBACT01C)in your next message. The agent receives the resolved content.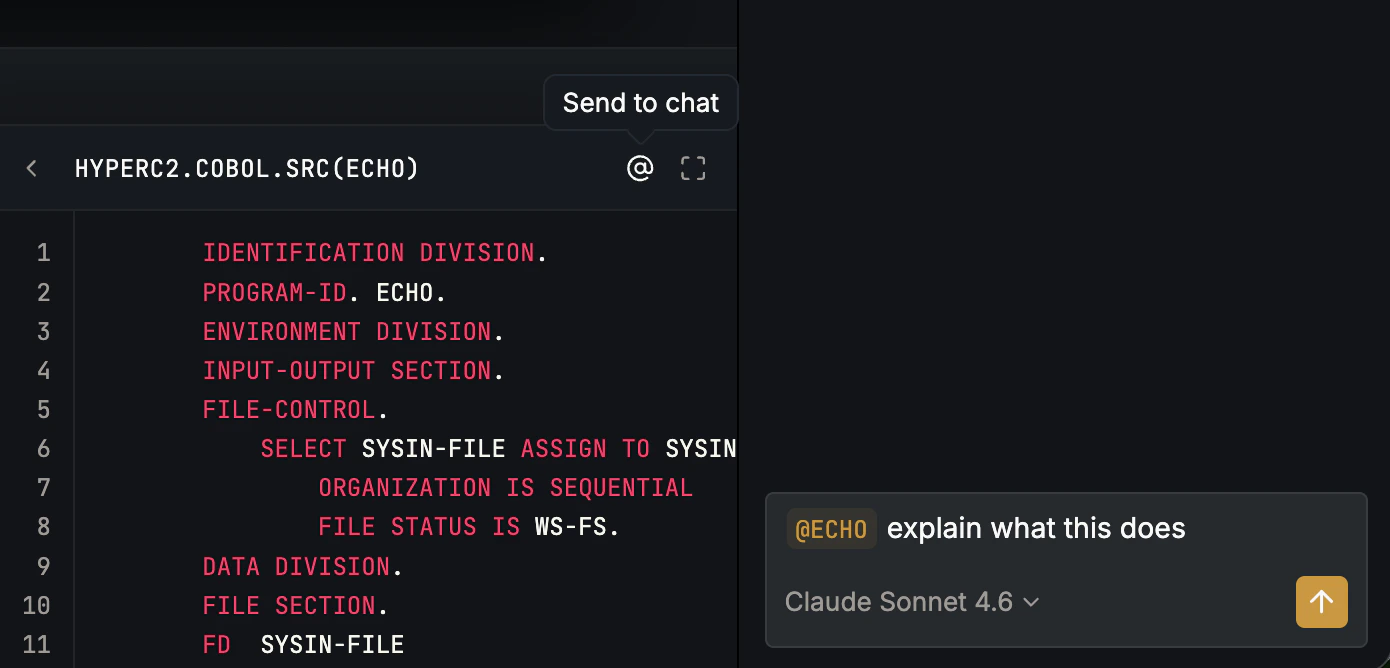
Using the jobs panel
The Jobs tab is your live view of the JES queue. Submit a job from chat or the terminal and it shows up here automatically.-
Track recent jobs in real time. Each job appears as a row with its Job ID, type (JOB/TSU/STC), name, status, return code, owner, class, and spool count. Status pills (queued, active, done, held) update as the job moves through JES, and return-code pills are color-coded by severity.
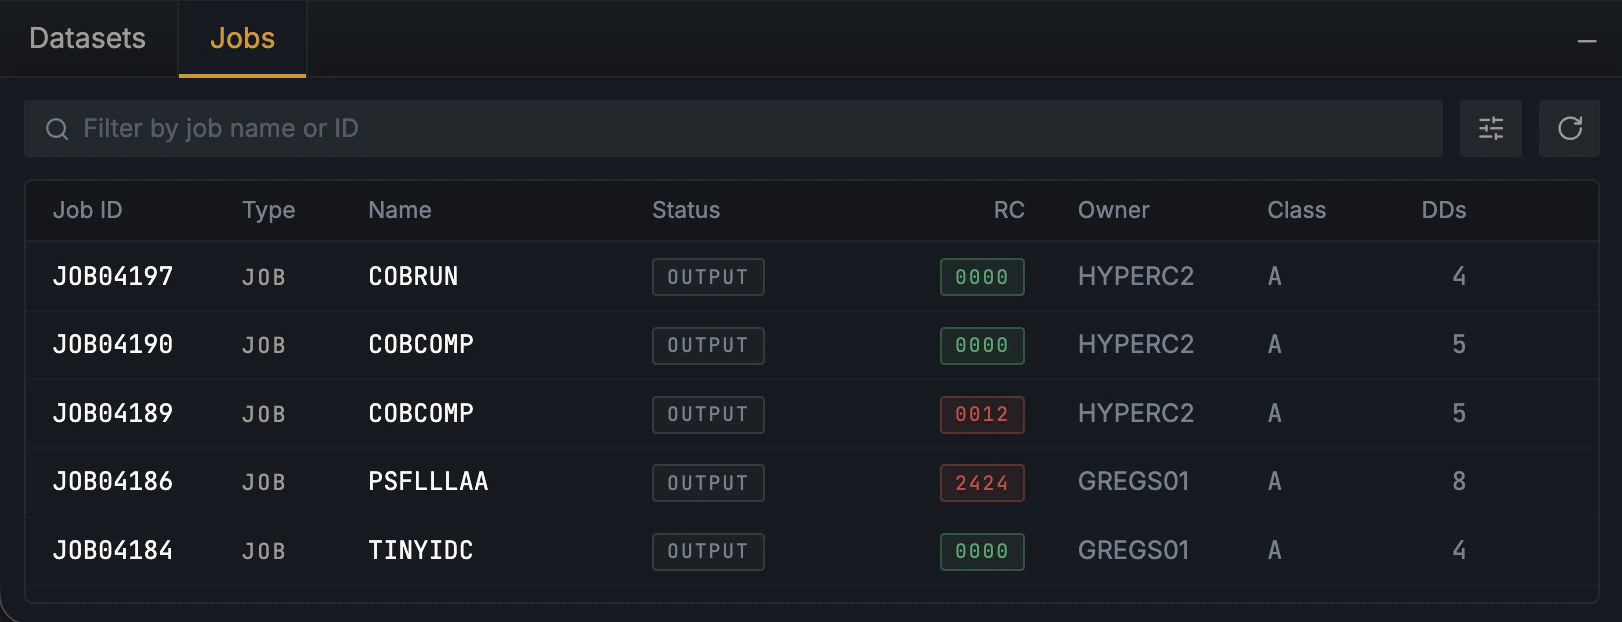
- Filter by name or ID. Type in the filter box to narrow the list. Use the filter menu for finer cuts (status, type, etc.).
-
Send to chat. Click the @ button on any row to attach the job as
@JOB04204in your next message. The agent can then pull spool, classify failures, and propose fixes.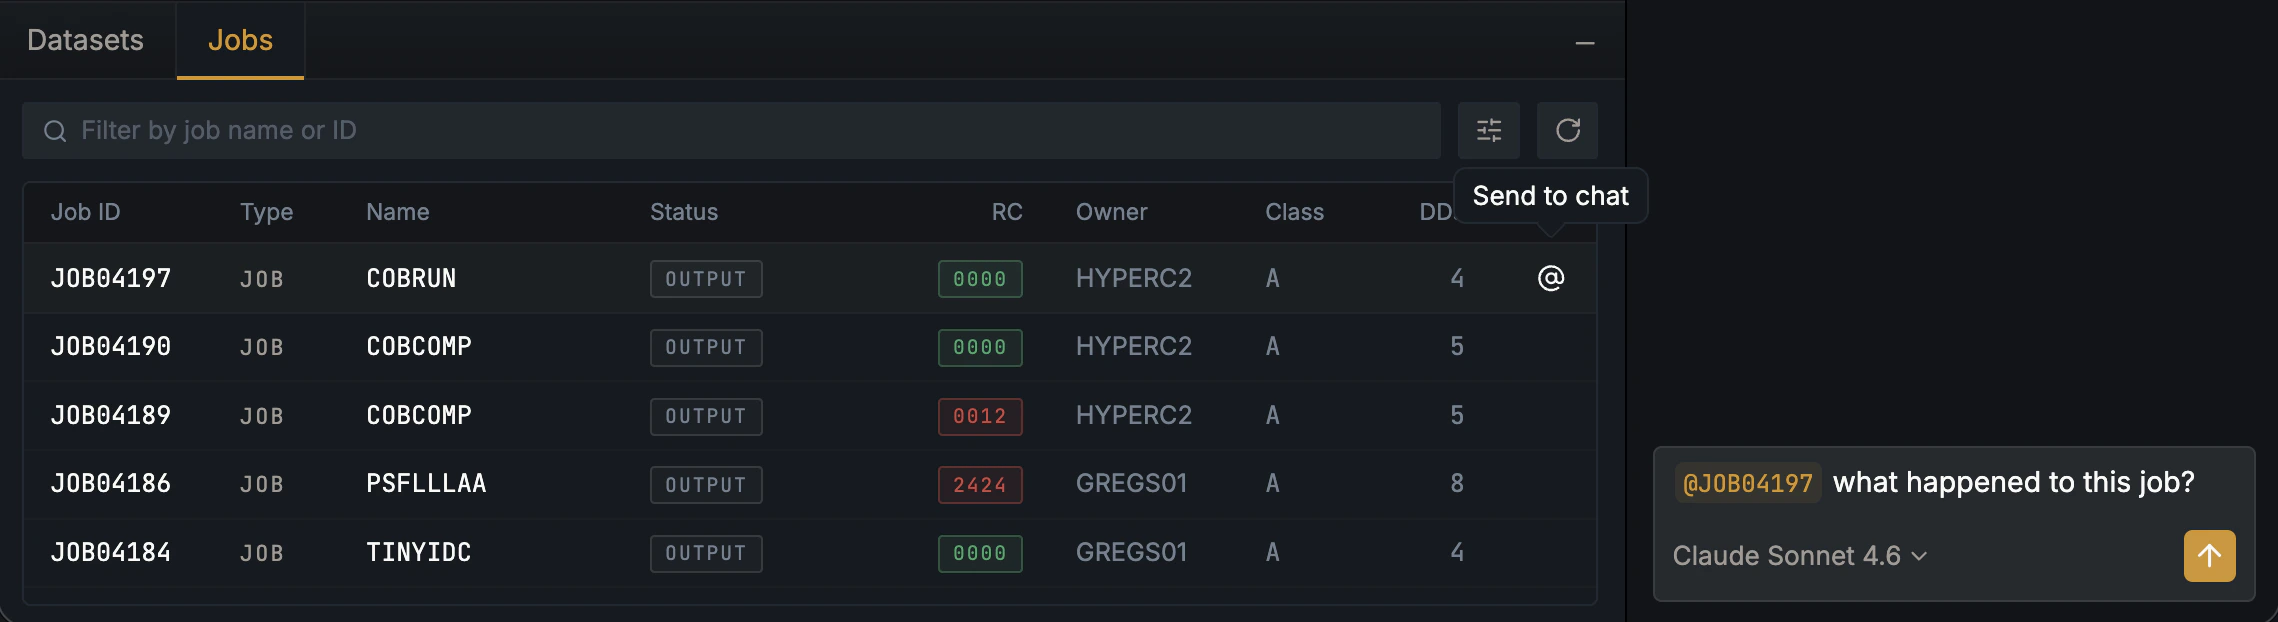
Network protocols
Hopper uses two standard mainframe protocols:- TN3270 for the live terminal session. Required.
- FTP for files (datasets) and batch jobs (the JES queue). Optional, but recommended — without it, the datasets browser, jobs browser, builds, and most agent tools stay disabled. Add or update FTP credentials anytime from Settings → FTP.
Shared session
The terminal you see in the panel and the terminal the agent uses are the same session. If you log on asACME01, the agent sees the post-logon screen. If the agent submits a CICS transaction, you see the response.
The shared session has three consequences:
- Visibility. Anything the agent does on the terminal shows up on your screen. There are no hidden actions.
- Two-way handoff. You can navigate to a screen and tell the agent to continue from there. The agent can also leave you on a screen for inspection.
- Hidden-field redaction. Password fields and other hidden inputs are masked before they reach chat history, telemetry, or logs. See Security & privacy.
Read-only vs. mutating actions
Each agent action shows up as a tool card in chat as it runs. Read-only actions (read a member, list a PDS, query a snapshot) execute immediately. Mutating actions (write a member, submit a job, modify a CICS resource) pause for your approval; you see the exact arguments before approving. See Tools for the full safety model.What Hopper isn’t
- No mainframe-side agent. Nothing runs on z/OS. Hopper is entirely client-side.
- No bulk data movement. Hopper reads and writes datasets; it doesn’t pipe data to another system.
- No production change management. The deploy feature targets dev/test. Production deploys go through your existing tooling.
Where to read next
The terminal
Why TN3270 looks the way it does, and how the in-app terminal works.
Datasets and jobs
The mainframe’s filesystem and batch system, in modern terms.
The AI agent
Turns, tool calls, history, approvals.
Tools
What the agent can do, and how Hopper keeps you in control.